
Secure Your React Native App with Keycloak Authentication: Comprehensive Guide
TABLE OF CONTENTS
Share on Social Media
Related Blogs

What is the behavior of Scope in AngularJS Directives?
Read More: What is the behavior of Scope in AngularJS Directives?
Enhancing Business Solutions with Retrieval-Augmented Generation and Generative AI
Read More: Enhancing Business Solutions with Retrieval-Augmented Generation and Generative AI
What is SqlDependency in .NET language?
Read More: What is SqlDependency in .NET language?
Importance of Estimation in Software Development The First Step to Success
Read More: Importance of Estimation in Software Development The First Step to Success")
With the rise in mobile app usage, securing user data has become crucial, and choosing an effective authentication solution is essential. Keycloak is a popular open-source Identity and access management tool offering robust authentication features. In this blog, we’ll cover integrating Keycloak authentication in a React Native application.
Keycloak security provides Single Sign On authentication, Identity Brokering, Social Login, and other powerful features, allowing applications to handle various mobile application security protocols like OpenID Connect, OAuth2.0, and SAML.
What is Keycloak?
Keycloak simplifies authentication and authorization by offering developers a solution that doesn’t require extensive custom backend configurations.
Main Benefits Of Keycloak API Authentication:

- Single Sign-On (SSO): Users can log in once and seamlessly access a variety of applications.
- User Federation: Integrates with LDAP and Active Directory to manage users.
- Social Login: Keycloak custom authentication supports integration with social media providers like Google, Facebook, and Twitter.
- Standard Protocols: Supports OpenID Connect, OAuth 2.0, and SAML for secure communication.
Why Use Keycloak with React-Native?
Keycloak offers secure authentication and authorization for mobile apps. Keycloak React Native authentication method also allows customizable user role definitions and efficient session management. Its robust features streamline user management while ensuring top-notch mobile app security.
Take Your App Security To The Next Level With Keycloak!
Book a free consultationSteps to Set Up Keycloak Authentication in React Native Project

Let’s walk through the Keycloak setup for authentication in a React Native app.
Step 1: Install The Keycloak Server
To get started, download and go for the Keycloak installation from Keycloak’s official website. Follow the instructions mentioned on the website for your operating system and start the server.
Step 2: Configure a Realm, Client, and redirectUrl
In Keycloak, a Realm represents a security domain. Each application or service can have its own realm. Here’s how to configure one:
a. Create a New Realm
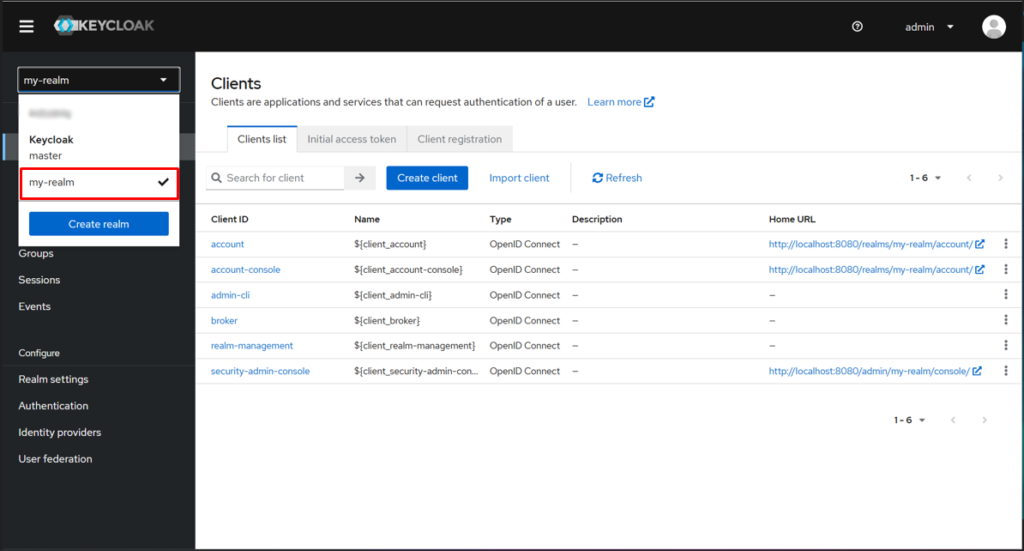
Open Keycloak admin console and select “Create realm”. Add your Realm name and create.

Select your realm.
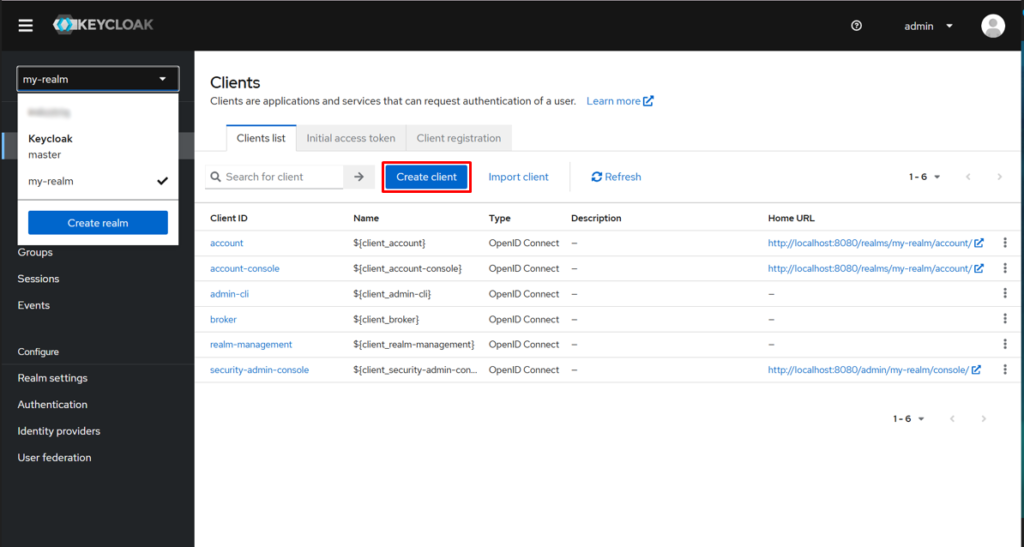
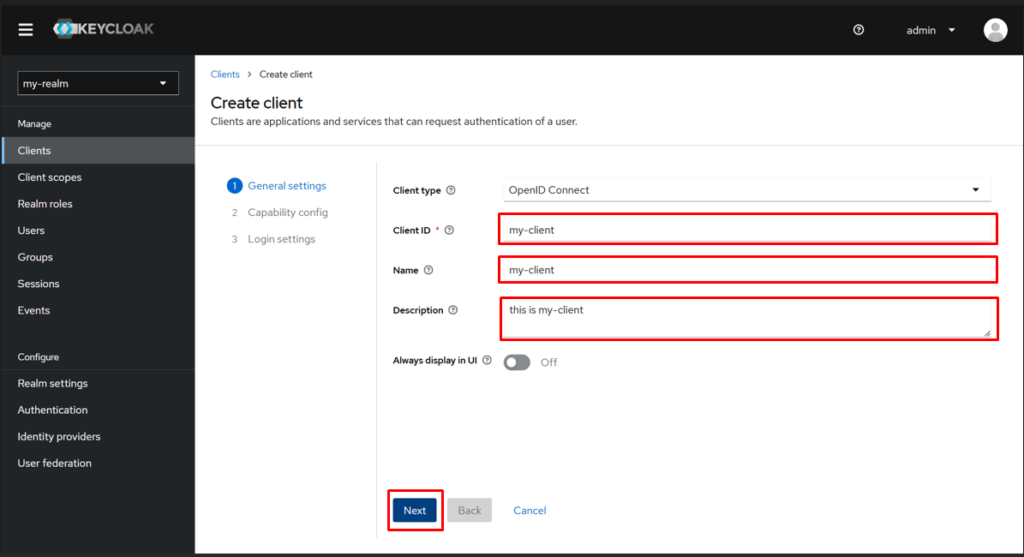
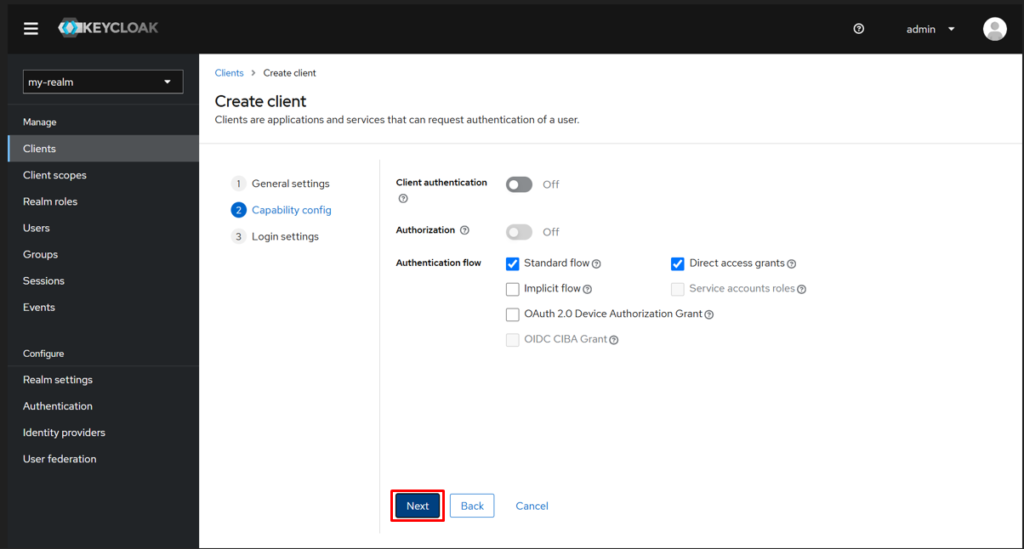
b. Create a Client
A Client represents the application we’re integrating with. In your new realm, go to Clients > Create client, and fill in the client details (e.g., Client ID, Name, Description).
Step 3: Integrating Keycloak with React Native
For the React Native app, you have to use the @react-keycloak/native package, which internally uses the react-native-inappbrowser-reborn package in the background. This combination streamlines the OAuth2 flow and integrates smoothly with Keycloak.
NOTE: Ensure you follow the implementation steps provided in the @react-keycloak/native documentation for proper setup and usage. Also, configure your redirectUrl appropriately; for react native keycloak example, “com.example”.
a. Create new keyCloak.ts file
Create a new keyCloak.ts file, add the following code, and replace the BASEURL, REALM, and CLIENTID values with your actual configuration.
import { RNKeycloak } from '@react-keycloak/native';
const keyCloakAuth = new RNKeycloak({
    // Add your URL, realm and clientId
    url: `${BASEURL}auth`,
    realm: `${REALM}`,
    clientId: `${CLIENTID}`,
});
export default keyCloakAuth;
b. Update your app.tsx file
Update your App.tsx file as shown below, and import keyCloakAuth from the keyCloak.tsx file. Make sure to replace “com.example” with your actual redirectUrl, and in “HomeScreen”, replace it with the screen you want to open after a successful login.
import { useCallback } from 'react';
import keyCloakAuth from './keycloak/keycloak';
import ApplicationNavigator from './navigators/Application';
import { ReactNativeKeycloakProvider } from '@react-keycloak/native';
interface Tokens {
    token?: string;
}
function App() {
    const onKeycloakTokens = useCallback((tokens: Tokens) => {
        if (tokens?.token) {
            // An optional function to receive AuthClient tokens when changed.
        }
    }, []);
    return (
        // If you have other Providers, it's recommended to place them inside ReactNativeKeycloakProvider


    );
}
export default App;
That’s all you have to do to integrate Keycloak authentication into your React Native application.
Why Choose Keycloak for Enhancing Mobile App Security?
Keycloak stands out for its seamless integration and robust security features tailored to modern mobile app development. It simplifies managing multiple authentication protocols, such as OAuth2.0 and OpenID Connect, and ensures compatibility with social login providers, making it versatile for diverse user bases.
Beyond authentication, Keycloak enhances user experience with advanced features like SSO (single sign on authentication) and user federation. These capabilities not only streamline access for users across platforms but also reduce the overhead of managing individual user credentials for developers.
Key Takeaway:
Integrating Keycloak authentication into a React Native application provides a secure and flexible solution for managing user authentication and authorization.
In this setup, we demonstrated how to configure Keycloak in a React Native project using a dedicated keyCloak.ts file to store the authentication configuration, and how to utilize the ReactNativeKeycloakProvider to manage authentication state across the app. By ensuring proper configuration, such as setting the redirectUrl and securely handling tokens, you can deliver a seamless authentication experience to your users.
At Triveni Global Software Services LLP, we specialize in providing tailored authentication solutions, including the seamless integration of Keycloak for secure user authentication in React Native applications.
Contact us today for a FREE Consultation.
Share on Social Media
Related Blogs

Micro Frontends Best Practices: Do’s and Don’ts You Need to Know
Read More: Micro Frontends Best Practices: Do’s and Don’ts You Need to Know
Mastering OWASP: Safeguarding .NET Applications from Security Vulnerabilities
Read More: Mastering OWASP: Safeguarding .NET Applications from Security Vulnerabilities
How to Manage Error Handling and Logging in Node Js?
Read More: How to Manage Error Handling and Logging in Node Js?
Basics of NLP : Zero to One
Read More: Basics of NLP : Zero to OneStay ahead of the curve
Get the latest insights, tutorials, and industry news delivered straight to your
inbox. Join 10,000+ developers and tech leaders.