How to Configure log4net multiple appenders?
TABLE OF CONTENTS
Share on Social Media
Related Blogs

How to Start with Enterprise Mobile and IOT Strategy
Read More: How to Start with Enterprise Mobile and IOT Strategy
Accelerate ReactJS Deployment: A Quick Guide to Azure DevOps Pipeline
Read More: Accelerate ReactJS Deployment: A Quick Guide to Azure DevOps Pipeline
Understanding Async and Await in C# Programming : A Simplified Guide to Asynchronous Programming in C#
Read More: Understanding Async and Await in C# Programming : A Simplified Guide to Asynchronous Programming in C#
What is SqlDependency in .NET language?
Read More: What is SqlDependency in .NET language?
An Open Source Library to record/log your application’s runtime behavior to a persistent medium.
Description
Let’s first understand why we need to use logging.Whether you are a fresh developer or have years of experience writing code, you probably know the concept of logging. Small pieces of text, written to the console, a file, a database, you name it, which will track what your software is doing and help you debug errors after they happen.
Log levels
Log messages written using log4net must be set to any one of the following:
1. Debug – informational events that are most useful to debug an application.
2. Info – logs informational messages
3. Warn – designates potentially harmful situations.
4. Error – designates error events that might still allow the application to continue running.
5. Fatal – events that lead the application to abort.
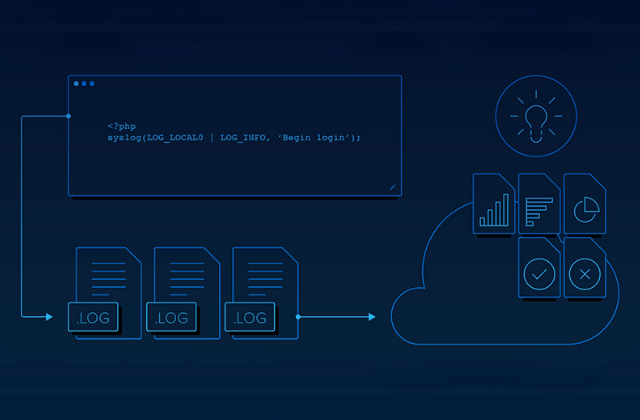
Where does the logging information go? Well, logging information goes to what is called an Appender. An appender is basically a destination that the logging information will go to.Examples of appenders are the console, a file, a database, an API call, etc.
Integrate Log4net from Scratch
1. Add the log4net Package
2. Specify appender web.config file
<log4net>
    <appender name="LogFileAppender" type="log4net.Appender.FileAppender">
      <param name="File" value="log.txt" />
      <param name="AppendToFile" value="true" />
      <layout type="log4net.Layout.PatternLayout">
        <param name="Header" value="[Header]rn" />
        <param name="Footer" value="[Footer]rn" />
        <param name="ConversionPattern" value="%d [%t] %-5p %c %m%n" />
      </layout>
    </appender>
    <root>
      <level value="INFO" />
      <appender-ref ref="LogFileAppender" />
    </root>
  </log4net>
3. Add below statement to AesemblyInfo.cs
[assembly: log4net.Config.XmlConfigurator(Watch = true)]4. Tell log4net to Load Config
5. Log something!
class Program
    {
        static void Main(string[] args)
        {
            ILog log = LogManager.GetLogger("mylog");
            log.Debug("This is a debug message");
            log.Info("This is an information message");
            log.Warn("This is a warning message");
            log.Error("This is an error message");
            log.Fatal("This is a fatal message");
            try
            {
                throw new Exception();
                // Something dangerous!
            }
            catch (Exception e)
            {
                log.Error("An error happened", e);
            }
        }
Appenders
It specifies where the information will be logged, how it will be logged, and under what circumstances the information will be logged. While each appender has different parameters based upon where the data will be going, there are some common elements.
<appender name="ConsoleAppender" type="log4net.Appender.ConsoleAppender">Layout
This will allow you to specify how you want your data written to the data repository. If you specify the pattern layout type, you will need a sub-tag that specifies a conversion pattern
<layout type="log4net.Layout.PatternLayout">
      <conversionPattern value="%date [%thread] %-5level %logger [%ndc]
    - %message%newline"/>
</layout>
Conversion Patterns
Conversion pattern entry is used for the pattern layout to tell the appender how to store the information.
There are many types of appenders available with log4net. You can choose as per your requirement. Below are commonly user appenders:
| Sr. No. | Appendar Type | Description |
|---|---|---|
| 1 | File Appender | Writes to a text file. file will be stored in the same location as the executable, we have specified that we should append to the file (instead of overwriting it). |
| 2 | Rolling Appender | This is an appender that should be used in place of the file appender whenever possible. The purpose of the rolling file appender is to perform the same functions as the file appender but with the additional option to only store a certain amount of data before starting a new log file. file is rolled when the file reaches a certain size. |
| 3 | Console Appender | It writes to the output window, or the command window if you are using a console application. |
| 4 | ADO.Net Appender | This specific example writes to SQL. |
CREATE TABLE [dbo].[Log](
  [Id] [int] IDENTITY(1,1) NOT NULL,
  [Date] [datetime] NOT NULL,
  [Thread] [varchar](255) NOT NULL,
  [Level] [varchar](50) NOT NULL,
  [Logger] [varchar](255) NOT NULL,
  [Message] [varchar](4000) NOT NULL,
  [Exception] [varchar](2000) NULL
) ON [PRIMARY]
Demo: Refer Link
Share on Social Media
Related Blogs

Generative AI and Its Impact: Everything You Need to Know About This Creative Technology
Read More: Generative AI and Its Impact: Everything You Need to Know About This Creative TechnologyWhat is SqlDependency in .NET language?
Read More: What is SqlDependency in .NET language?
Enhancing AI Capabilities with RAG in Node.js:A Step-by-Step Tutorial
Read More: Enhancing AI Capabilities with RAG in Node.js:A Step-by-Step Tutorial
BLoC Flutter State Management Explained:A Step-by-Step Guide
Read More: BLoC Flutter State Management Explained:A Step-by-Step GuideStay ahead of the curve
Get the latest insights, tutorials, and industry news delivered straight to your
inbox. Join 10,000+ developers and tech leaders.